Ah! Repairing CD players... If you have experience modding your CDP, repairing them seems like an extension. Or shouldn't it be a pre-requisite? Nevertheless, most of the repairs on CDP is just by replacing the laser pick-up assembly. You see, over time, even the strongest laser will die out. And a CDP without its laser it's like a Diyer without his soldering iron, Austin Powers without his mojo...
So your friendly Diyer here will show you how to change/replace this flimsy little construction that will cost you a bomb to repair at most repair shops. I guess you also know that your friendly Diyer is going to incur the wrath of many repair shops. Very soon, there might be a hit squad sent out to nail me down, so as compensation for me giving up so much, would you care to send some $$ my way?
Okay, enough talk. 10 more pages won't even see you get off your bum, what less write me a check?
It would be great if I could showcase the Marantz CD63 as it's the CDP I get most of the time for repairs. Since it's been discontinued few years already, and due to its immense popularity back then, no wonder there's so many CD63s for repair. Unfortunatley, not this time... So I had to showcase the Marantz CD46. Hopefully you are "bright enough" to adapt what I have here towards your own CDP. Now, I bought this CD46 when I was a student back in the US. Cost me USD200 then. 6 years later, it has given up its ghost. Can't read CDs anymore. If you haven't ventured into hacking up the CDP, it's most likely that your laser pick-up assembly has gone to CD heaven. Err, before I write further, I assume you know how to open up your CDP?
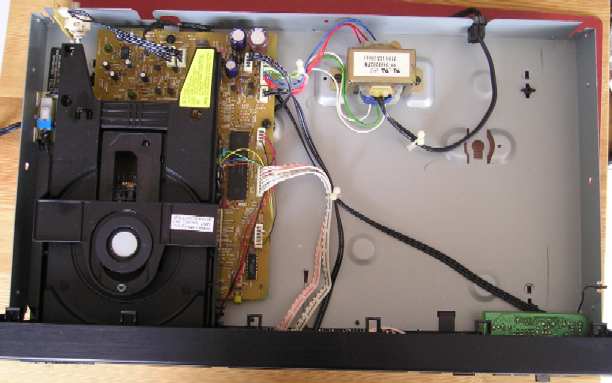
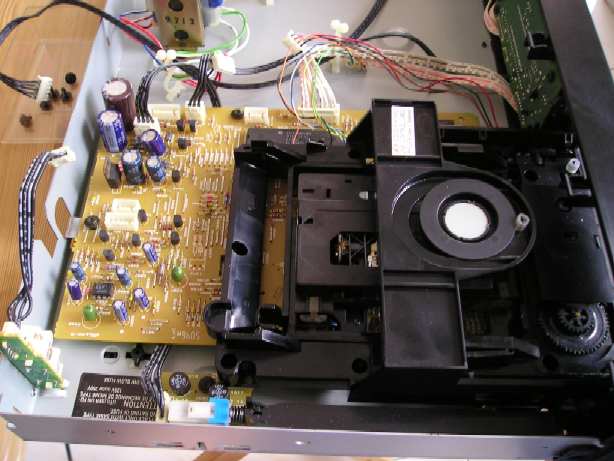
Here's the internal view. Very spartan, in fact half the CDP is "air", so I paid USD100 for "air"! But if you are a diehard Diyer, you should be smiling with delight as the possibilities to hot rod this CDP is enourmous! Need I start? Add in a clock, tube output stage, blah blah blah... You could even wire in a 1W amp using 5842 tubes. How about a "high end" mini compo?
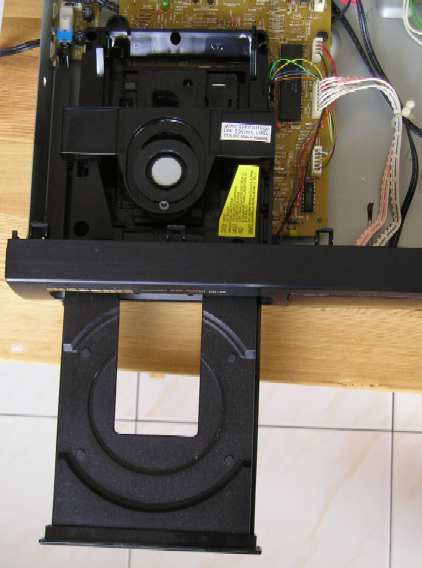
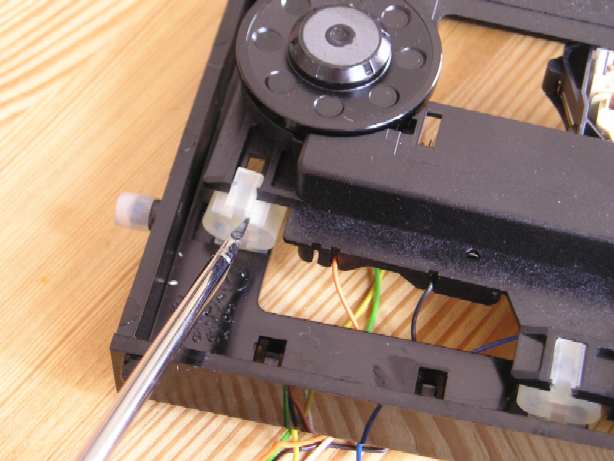
To access the laser pick-up, you need to dismantle the whole transport. So get the tray out of the way! A gentle push should do but some models have little gears underneath, so please check your CDP.
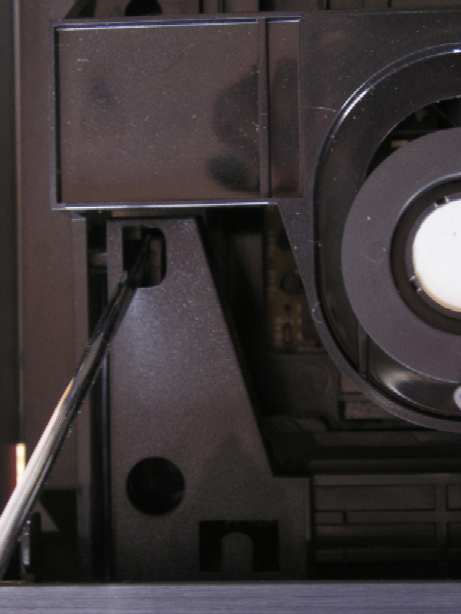
At its max, you won't be able to pull out the tray anymore, as there's this little latch that's holding it back. Refer to previous pic again to see carefully the latch. Use a flat head screw driver to push this latch aside.
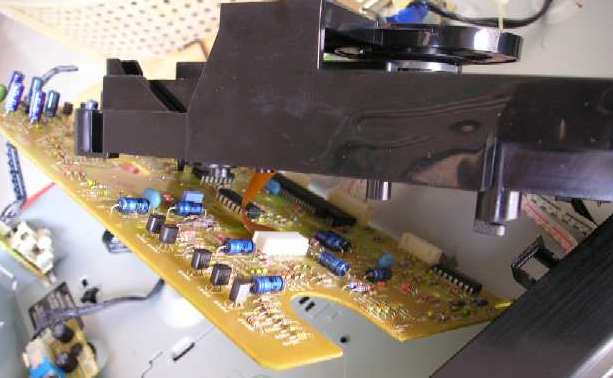
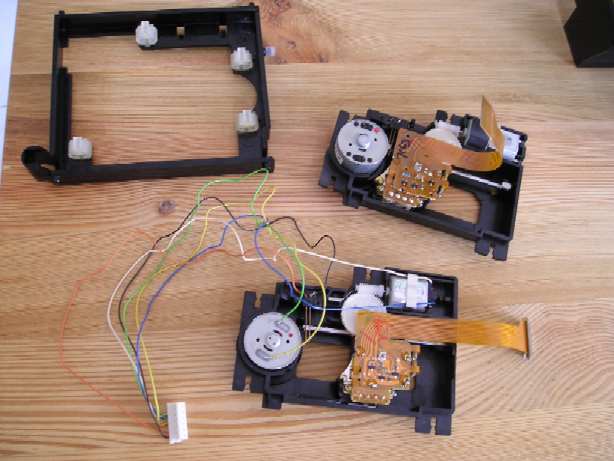
Once you got the tray out, it should be relatively easy to remove the transport. Disconnect those wires, unscrew those screws. Be careful though. This is the most crucial step as you need to pay attention to how your transport is assembled, as you later need to PUT IT BACK. Yes! Dismantling is easy! But putting it back is always troublesome, especially if you don't pay attention now. Since this is specific to each model, there's no point for me to show you pics. Just study the construction, okay? For the CD46, those wires circled in green are connected to the transport. For the CD46, as the transport is secured to the PCB, I had to remove them both. But for some models, they are separated. So study your CDP okay?
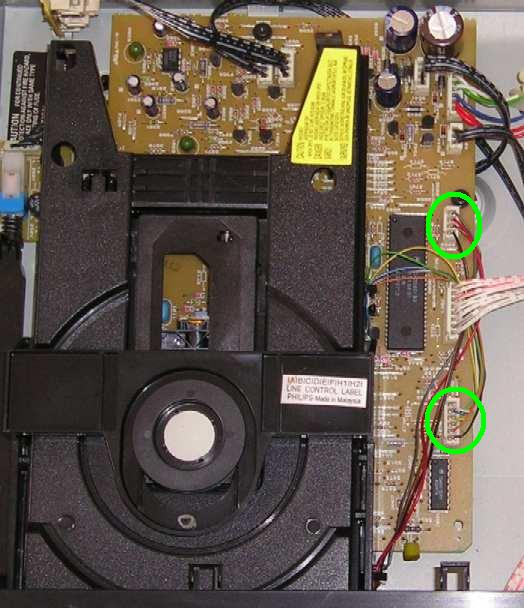
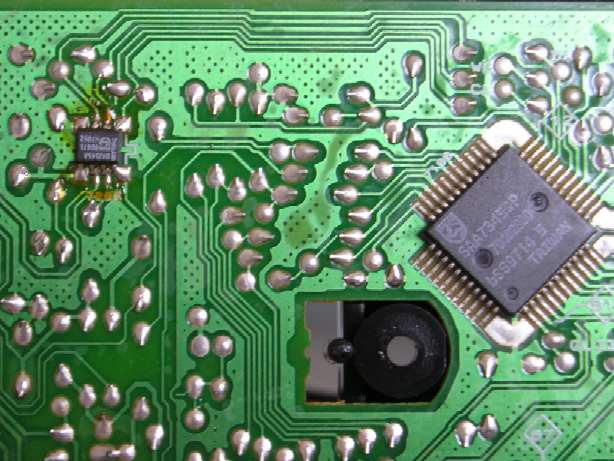
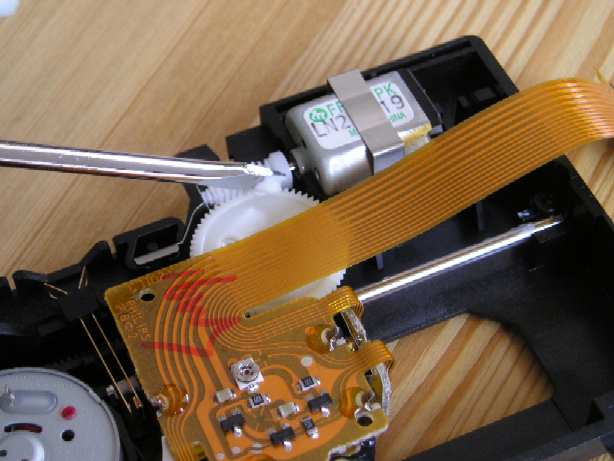
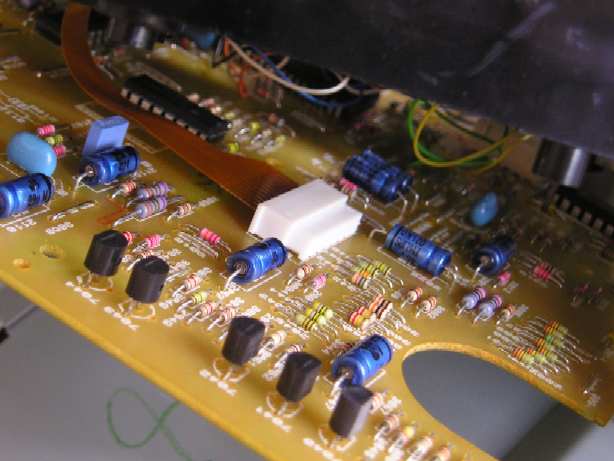
Another reason why you should consider modding a CD46. The DAC chip is the TDA1545A. CMOS scaled-down version of the TDA1541. Those lines connected to pins 1/2/3 are the I2S lines... Non-Oversampling!
There's a flex cable linking the laser pick-up to the PCB and it's directly underneath the transport. Your CDP might be different but be careful... These things are really flimsy. To disconnect, using your thumb and index finger, gently push the white connector towards the flex cable.
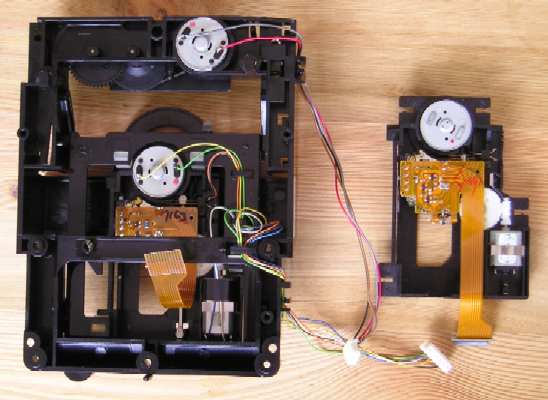
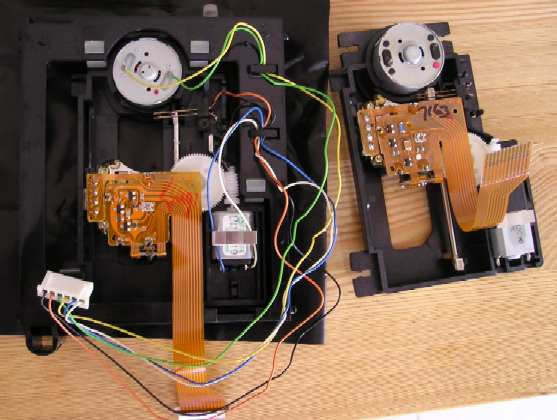
With the transport section out, now side by side, we have the new pick-up assembly on the right. And existing one in the transport on the left. Think you can swap them?
Well, you need to take it out first. It's really easy as all you need to do is "slide it out". I know it doesn't make sense now but when you study your naked transport, you should be able to figure this out. Note that the new pick-up's flex cable has a metal termination. Please leave it there until you are ready to connect it into its white connector. You don't want it to pick up ESD merrily. By right I should be doing all this on a ESD safe mat...
Now you should have the pick-up in its holder. To remove it from its holder, with a flathead, gently push out those plastic springs. Ditto when assembling.
It's a good idea to grease your new pick-up assembly right now, just before you solder the wires in. Be adult and apply carefully. Only the plastic bearings and the chrome shaft please. It's best to use lithium-based grease. Ask around.
This is straightforward. You are just changing parts, so don't try to be smart and wire it up some other way. Follow exactly the original unit! To reduce the likelihood of soldering wrong wires, desolder/solder one at a time. If you desoldered a few and forgot which wire goes where, you can only blame yourself... After you are done soldering, fitting back into its holder, slide it back to where it belongs.
Alright! New assembly in place! Now only I remembered to use those ESD sheets. Hmm... Err just before you reassemble the transport, it's a good idea to grease all moving parts.
Putting it back all together... Be careful of flex cable again. Make sure you get a good lock here.
Almost! Be extra careful here. Make sure all your moving parts are still free to move. If you have one extra screw...
After connecting all the necessary wires you pulled out previously, you are ready to test it. Switch on the CDP and it should read "No Disc". Put in a CD you hate most (preferably audiophile). The CD should spin clockwise and be able to read the TOC (Table of Contents). In case you are wondering what's TOC, well, information like how many tracks, how many minutes of sonic heaven/hell this CD contains...
If it does read the TOC, you are almost home free! Proceed to "Play"! If TOC can't be read, check any broken/missing connections. If CD spins counter-clockwise... you are in trouble. Either the replacement pick-up is a dud or you screwed up something...
I hope I haven't scared you yet. Have fun!
Lastly, will like to thank BS Lee as he was the one who showed me how to repair the CD63. Thanks a lot!